
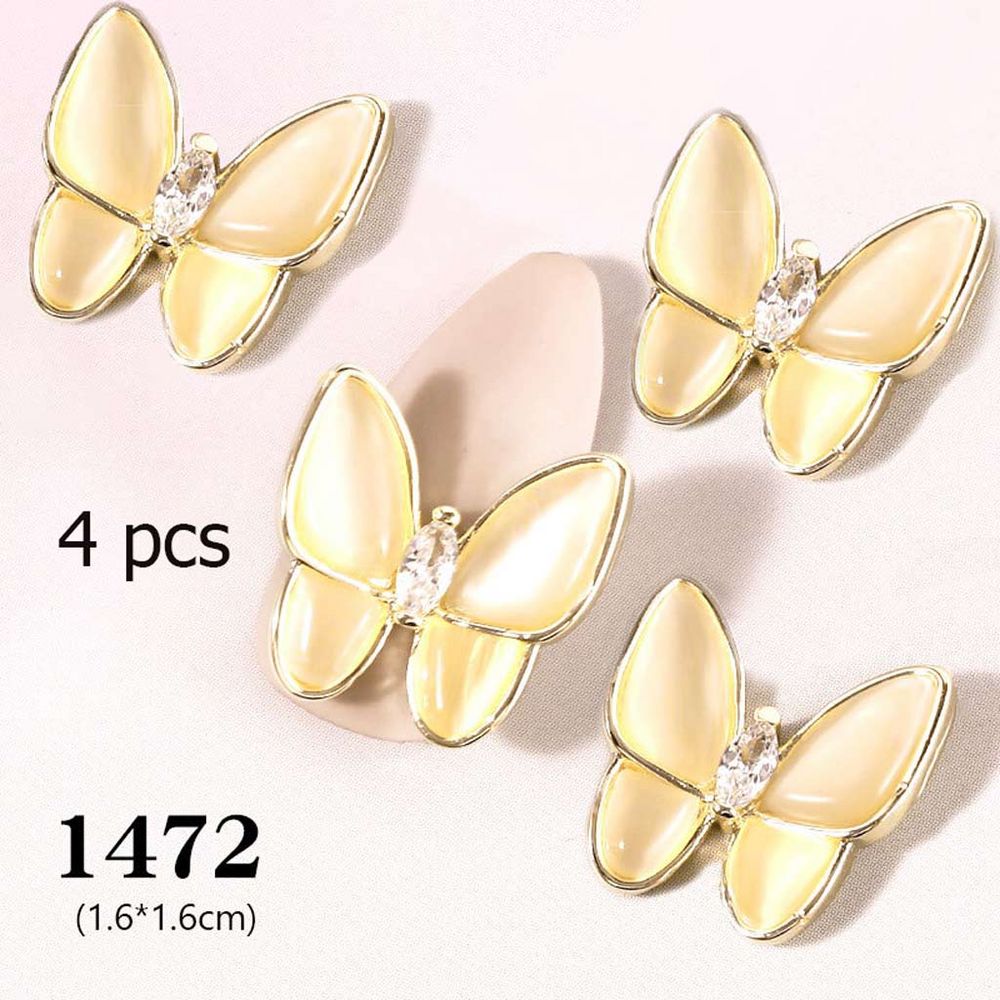
Small, eye-catching accents can turn a routine manicure into a memorable salon moment. For technicians who want to add a luxe finishing touch without slowing their schedule, a compact pack of 3D butterfly nail charms is an easy, high-impact option.
Why a 4-piece charm pack belongs in your service rotation
Working with a 4-piece set of 3D butterfly nail charms lets you offer specialty accents for single-hand looks, bridal touch-ups, or custom nail art add-ons. These charms are specifically made for nail art design and arrive in a single bag containing four pieces — the right quantity for targeted accents without overstocking.
Add a bag of Nail Charms 4 pcs to your accessory tray so you can instantly offer a fluttering accent during bookings, pop-up events, or walk-ins.
Where the charms fit into a standard salon manicure
- Consultation: During design discussion, show one charm on a sample nail or swatch to help the client visualize placement and scale.
- Prep: Complete cuticle work, shaping, and base application before considering embellishments so the surface is clean and predictable.
- Placement: Add the charm after color layers are cured but before the final topcoat or final cure step designed to secure the piece.
- Seal and finish: Lock the charm in place with a compatible adhesive or encapsulating gel and apply any recommended topcoat protocol to protect edges.
Placement techniques that save time and reduce callbacks
Because the pack contains only four charms, plan usage for high-visibility nails: thumbnails, ring fingers, or single-statement accent nails. Consider these practical tips:
- Position the charm with tweezers or a wax pick so you don’t smudge the surrounding polish.
- Press gently into a small bead of builder gel or a drop of nail glue, then cure according to the product used.
- For clients who request longevity, encapsulate the charm under a thin layer of clear gel or builder to reduce snagging.
Tools, adhesives and cure strategy
Compatibility and technique determine how long a charm will stay put. Common salon approaches include using a drop of professional nail glue for quick styling, or embedding the charm with a layer of builder or sculpting gel and curing for a stronger hold. Keep these points in mind:
- Work on a cured polish or primer layer so the adhesive bonds to a stable surface.
- Use the smallest amount of adhesive needed to avoid overflow onto the nail surface.
- When encapsulating, apply a controlled thin layer to maintain the charm’s three-dimensional look while securing edges.
Sanitation, storage and inventory best practices
Because the pack is small, track inventory so you always have fresh options for clients. Store unopened bags in a clean, dry drawer or organizer to protect the charm’s finish. For sanitation:
- Only handle charms with sanitized tools (tweezers, wax pick) rather than bare hands.
- Do not reuse a charm that has been applied to a client’s nail unless your salon’s process explicitly allows for safe re-application and it meets local regulations.
Who benefits most from adding these charms to their kit
Technicians who run busy schedules but still want to upsell signature looks will find a four-piece charm bag practical. They’re ideal for:
- Special occasion services (weddings, photoshoots, events) where one or two standout nails are preferred.
- Express nail services where clients want a quick statement accent without a full set overhaul.
- Design-focused techs building a small library of interchangeable focal pieces for seasonal menus.
This compact option is available for a modest outlay — the current listed price is $8.00 — making it easy to trial styles without a large investment.
Care, safety notes and client communication
Be clear with clients about wear expectations: 3D accents add texture and may affect how gloves, clothing or hair interact with the nails. Discuss removal options in advance so clients know whether the charm will be soaked off or removed in-salon. When securing charms, practice careful glue application to avoid skin contact and follow manufacturer guidance for any adhesive or gel used.
Quick workflow checklist for service stations
- Keep one bag of charms in each design station or a central, labeled organizer.
- Show a sample during consultation to confirm placement and client approval.
- Prep nail, apply color, cure as normal.
- Place charm with tweezers into a small adhesive bed or gel spot, cure if required.
- Seal as needed and perform a final finish check for edges or excess adhesive.
Integrating a four-piece set of 3D butterfly nail charms into your salon workflow is a low-cost way to boost perceived service value and offer clients a memorable accent without disrupting appointment timing. Keep a few packs on hand, standardize your placement and sealing steps, and you’ll be able to present this decorative option confidently during consultations. Dynamic Nail Supply lists this style as a nails art accessory, making it easy to source through established professional channels.
Conclusion: For salons aiming to streamline add-on offerings, these compact 3D butterfly nail charms deliver visual impact with minimal disruption to throughput — a smart choice for technicians focused on efficiency and design.
